|
|
|
List of BC Adventure Advertisers Site Info
Advertise With UsAwards About Us Contact Us  Kayak with Killer Whales Free Vacation Guides
BC Vacation GuidesCoastal Vacations Thompson Okanagan EcoTourism Fishing Vacations Guest Ranch Guide Romantic Getaways Wilderness Vacations Winter Vacations The Rockies Guide 
Coastal Spirits Expeditions Login |
Most anglers re aware of dietary staples in the diets of trout and char in productive stillwaters such as those of the interior plateau of British Columbia. Dragons, damsels leeches and scuds all pop to the forefront. But there is one quiet, consistent stillwater staple few anglers consider, chironomid larvae or bloodworms. Easily the most important item on the menu of trout in lakes, chironomids offer year round fly fishing opportunities.
The majority of bloodworms spend their time living in tube homes they construct along the bottom of the lake, venturing out only to feed or move residences. Many species are able to generate hemoglobin that gives the larva the ability to survive in oxygen deficient waters. The red coloration of the hemoglobin led to the larva's common nickname, bloodworm. But don't be limited by the color red, I have seen larvae that are maroon, green, olive and even candy cane combinations of red and green. As a general guideline the clear the water the brighter the bloodworm. Mud-bottom lakes such as Tunkwa and Leighton are known for their large maroon and candy cane colored bloodworms, while those from clear marl lakes, such as White or Peterhope tend to be a bright crimson. Pathetic swimmers, chironomid larvae move through the water column using a vigorous lashing motion coupled with rests in an extended position. Although animated, this action nets very little if any forward progress. Floating lines coupled with long, fifteen foot plus leaders are my favorite tactic. Depending upon the depth of the water it may take 3 minutes or longer for the fly to reach the ideal fishing depth, just above the bottom.
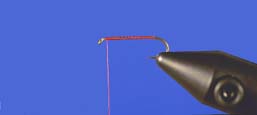
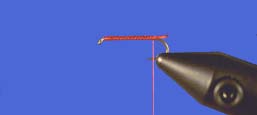
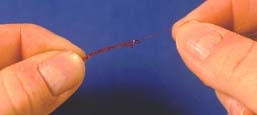
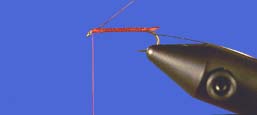
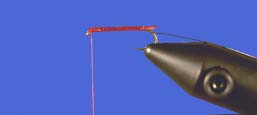
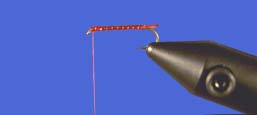
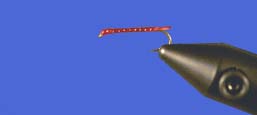
Chironomid larvae go through two seasonal migrations. In the spring the larvae move from the deeper water into the shallower reaches in preparation for pupation and emergence. The reverse occurs in the fall as the larvae prepare for the oncoming winter, making early spring and late fall peak times to probe the waters with larval patterns. Low light conditions such as morning and early evening are other prime times to consider. Under the security of the reduced light bloodworms leave the security of their tube homes to forage and wander about. I often begin my day diligently working or wind drifting a bloodworm pattern until the hatches of the day get into full swing, its not unheard of to stick with the larval pattern all day long. The basis of the Frostbite Bloodworm is simplicity. Like the larva itself, this thought pattern does not inspire angler confidence. Using other spartan patterns as a guide I devised a pattern consisting of a small V tail, bright red body and fine wire rib, only recently did the tail become a regular feature, imitating the distinct posterior pro-legs of the larva. My original concept consisted of a body of Frostbite counter wound with fine copper or silver wire. The anorexic nature of this pattern helps improve its sink rate too. To accelerate the descent even further, try a small tungsten bead or underbody of fine wire. When forming the wire under body, wind the wire down hook shank making sure to leave enough to form the rib. Do not counter wind the rib as this serves to unravel the underbody, instead wind the rib using the traditional over the top technique. My favorite sizes range from #10 through #16, with a size twelve has been my most consistent producer. Mix and match various colors of Frostbite to create the different banded effects that are common to many species. My favorites include red, maroon, olive and green.
Bloodworm patterns do little for anglers not familiar with their guile as most prefer to grab a robust dragon or animated leech pattern instead. Believe me at first I was skeptical too, after all casting a tiny red or green stick into the vast expanse of a lake seemed crazy. But as my knowledge and experience grew, so did my confidence in these slender designs. So the next time choosing the right pattern seems a bit of a mystery tie on a bloodworm pattern, such as my Frostbite Bloodwom. Be sure to wait patiently for it to sink to the right depth, creep it back at a snail's pace, chances are any trout in the area will be happy to make a meal of it. The Frostbite Bloodworm
|
 Follow Us On Facebook Articles Fishing VancouverPhils Flybox
Bill's Big RedDunc's Floating Carey Frostbite Bloodworm Glenn's Leech Marabou Prawn Pearl Shrimp Silly Creek Saviour The Black Sally The Clouser Minnow The Collaborator The Damsel Leech Thing The Epoxy Minnow The Popsicle Stillwater Fly Tactics
Chironomid TipsDamsels Leeches Looking For Clues Scuds Writers:
Peter Caverhill Brian Chan Fred & Ann Curtis Ian Forbes Geoff Hobson Gordon Honey Steve Kaye Fred's Custom Tackle Ron Newman D. C. Reid Philip Rowley Barry Thornton |
|||||||||||||||||
|
|||||||||||||||||||

