|
|
|
List of BC Adventure Advertisers Site Info
Advertise With UsAwards About Us Contact Us  Kayak with Killer Whales Free Vacation Guides
BC Vacation GuidesCoastal Vacations Thompson Okanagan EcoTourism Fishing Vacations Guest Ranch Guide Romantic Getaways Wilderness Vacations Winter Vacations The Rockies Guide 
Coastal Spirits Expeditions Login |
As wandering Cutthroat gorge themselves on stickleback, chub, or salmon fry lower mainland fly fishers flock to the sloughs and rivers throughout the eastern Fraser Valley in pursuit. Cutthroat are noted for their love of fish in their diet so minnow and streamer patterns figure prominently in the ardent cutthroat fly anglers fly box. Lakes containing cutthroat are worthy of a visit too. Working in teams, cutthroat herd their prey much like ocean going salmon slashing through herring balls. Just about any fly cast into this melee draws a response.
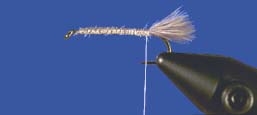
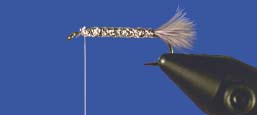
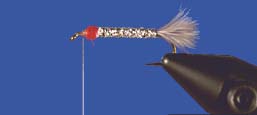
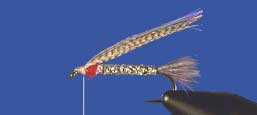
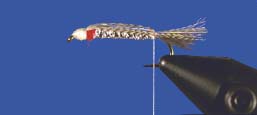
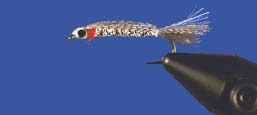
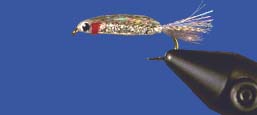
The numerous variations of the venerable Tied Down Minnow are one of the most popular cutthroat pattern styles. This sleek design does a superb job of mimicking the slender pin like look of so many small forage fish. The only failing of this pattern is its durability. After a couple of good chewings the namesake tied down back of the fly becomes tattered and pulled. The angler either retires the fly or pulls the back loose turning the pattern into a traditional streamer. With the explosion of saltwater fly designs incorporating epoxy it was only a matter of time until these concepts spread to freshwater tying. To some this is old news as many anglers have been using epoxy for years and they might wonder what took everyone else so long. At first glance I wondered what was the difference between some of the epoxy creations I saw and a Rapala lure. They looked the same with the exception of the treble hook garnish. Over time I accepted this epoxy invasion as the bright appearance and overall durability became too much to overlook. Epoxy now reaches all corners of my fly box from chironomid to water boatman patterns. A little dab of epoxy on a wingcase provides pre emergent glitter and a ton of durability. For the Epoxy Minnow I start by tying a tuft of marabou to provide the pulsing action of a minnow's tail, while silver diamond braid makes for a quick and easy body. To imitate the gills of a wounded forage fish use a couple of wraps of red rabbit fur dubbing. Rabbit fur is user friendly and fits in with the slim profile of this pattern. For the back the variegated look of mallard flank either natural or dyed realistically imitates a wide spectrum of forage fish. To add a little flash and sparkle I mix in a few strands of matching Angel Hair for good measure. Tie down the mallard flank and Angel Hair both front and rear. Build up a large white thread head to simulate the head of a baitfish followed by a couple of stick on eyes. Cover the entire fly except for the tail with a few liberal coats of epoxy. A drying rack using a rotisserie motor keeps the drying flies in constant rotation so the epoxy hardens in a uniform manner the alternative is to use a fast drying epoxy, spinning the fly by hand until dry.
On the majority of rivers and sloughs I use a floating line 90% of the time. The floating line allows for a smooth quick pickup to chase rising fish. It also keeps the fly up in the water column so the cutthroat can vault up from below to strike the fly. In the deeper reaches of some sloughs and lakes I switch to a sinking line of appropriate density from an intermediate to type 3 or 4 Uniform Sink. Keep a feel for soft takes too, sometimes cutthroat gently mouth the fly as if they are sampling the fly before swallowing. Keep the retrieve varied from a quick darting panic-stricken pace to one of casual meandering. In moving waters I try to mend and manipulate the fly so it swims broadside and down stream as the current makes it impossible for any forage fish to head upstream. This presentation also offers a broad visible silhouette for the trout to hone in on. The Epoxy Minnow
|
 Follow Us On Facebook Articles Fishing VancouverPhils Flybox
Bill's Big RedDunc's Floating Carey Frostbite Bloodworm Glenn's Leech Marabou Prawn Pearl Shrimp Silly Creek Saviour The Black Sally The Clouser Minnow The Collaborator The Damsel Leech Thing The Epoxy Minnow The Popsicle Stillwater Fly Tactics
Chironomid TipsDamsels Leeches Looking For Clues Scuds Writers:
Peter Caverhill Brian Chan Fred & Ann Curtis Ian Forbes Geoff Hobson Gordon Honey Steve Kaye Fred's Custom Tackle Ron Newman D. C. Reid Philip Rowley Barry Thornton |
|||||||||||||||
|
|||||||||||||||||

